How to Connect a Car Battery: Step-by-Step Guide
Connecting a car battery is an essential skill for any vehicle owner. Whether you’re replacing an old battery, dealing with a dead battery, or performing maintenance, it’s important to know the right way to connect a car battery. This process ensures safety, prevents damage, and helps your vehicle start properly. In this guide, we will walk you through everything you need to know.
Materials Needed
Before diving into the step-by-step process, make sure you have the following tools:
- A new or charged car battery
- Wrenches or pliers
- Safety gloves and goggles
- Baking soda and water (for cleaning corrosion)
- A cloth for cleaning terminals

Step 1: Turn Off the Engine and All Electrical Components
Before starting any work on your car’s battery, ensure that the engine is turned off. This is crucial to avoid electric shocks, short circuits, or any accidental damage to the vehicle’s electrical system. Also, make sure to turn off any electrical components like lights, radio, or air conditioning.
Step 2: Disconnect the Old Battery (If Applicable)
If you’re replacing an old or dead battery, you must disconnect it before installing the new one. Always begin with the negative terminal (marked with a minus sign). Here’s why:
- Disconnecting the negative terminal first minimizes the risk of a short circuit. The negative terminal is connected to the vehicle’s frame, so it’s best to disconnect it before working with the positive one.
Use your wrench or pliers to loosen the clamp and remove the cable from the negative terminal. After that, move on to the positive terminal (marked with a plus sign) and disconnect it in the same manner.
Step 3: Clean the Battery Terminals
Sometimes, corrosion can build up around the terminals. Cleaning the terminals before connecting a new battery is essential for a smooth connection. Here’s how you can clean the terminals effectively:
- Mix a solution of baking soda and water.
- Dip a cloth or brush into the solution and gently scrub the battery terminals to remove any corrosion.
- Wipe everything dry with a clean cloth.
Step 4: Install the New Battery
When installing the new battery, ensure that it’s placed correctly in the battery tray. The positive terminal should be aligned with the red cable and the negative terminal with the black cable. Make sure the battery sits securely in its compartment, and there’s no movement.
Step 5: Connect the Positive Terminal
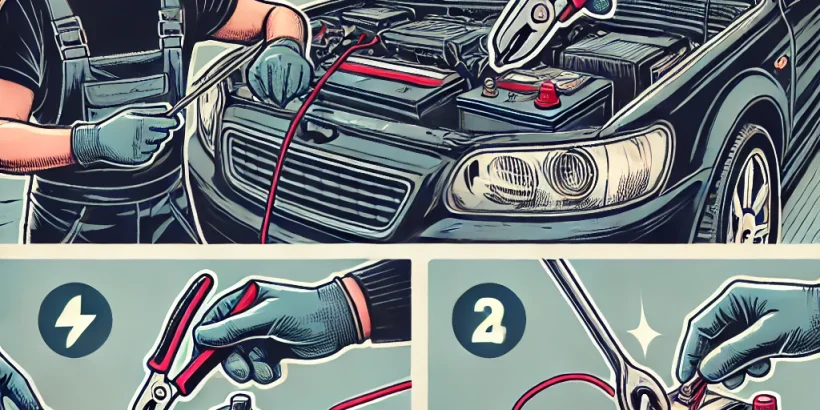
Now, take the positive (red) cable and connect it to the positive terminal of the new battery. Use your wrench or pliers to tighten the clamp securely. Be careful not to overtighten, as this can damage the battery terminal.
Step 6: Connect the Negative Terminal
Once the positive terminal is connected, move on to the negative (black) cable. Attach it to the negative terminal of the new battery and tighten the clamp.
Step 7: Check Your Connections
Before starting the car, double-check your connections. Ensure that the cables are securely attached and there is no corrosion. Also, make sure that the battery is in place and there’s no risk of it shifting during driving.
Step 8: Start the Car and Test
Now, it’s time to test your work. Start your car. If the engine turns over smoothly, then the battery is properly connected. If the car doesn’t start, check your connections again for any loose cables or corrosion.
Step 9: Dispose of the Old Battery
If you replaced an old battery, be sure to dispose of it properly. Most auto parts stores or recycling centers will accept used car batteries for recycling.
Key Safety Tips for Connecting a Car Battery
- Wear safety gear: Always wear safety gloves and goggles to protect yourself from any potential hazards.
- Avoid sparks: Do not allow the wrench or any tool to come into contact with both battery terminals at the same time.
- Keep tools dry: Ensure your tools are dry to avoid short circuits when working with the car battery.
- Check for leaks: If you notice any leaking fluid from the battery, handle the situation carefully and avoid connecting the battery.

Common Troubleshooting Tips
1. Car Won’t Start After Connecting the Battery
If the car doesn’t start even after you’ve connected the battery correctly, check the following:
- Loose connections: Ensure the cables are tightened securely.
- Corrosion: Inspect the terminals for any remaining corrosion.
- Faulty battery: If the battery is old or defective, it may not hold a charge.
2. Warning Lights Appear After Battery Installation
Sometimes, after installing a new battery, warning lights may appear on your dashboard. This could be due to incorrect voltage settings or other underlying issues. It’s best to consult a professional mechanic if this happens.
Why Connecting a Car Battery Correctly is Important
- Safety: Improper connections can cause sparks, battery leaks, or electrical shorts, leading to fire or injury.
- Optimal Performance: A properly connected battery ensures that your car starts efficiently and all electrical systems function well.
- Battery Lifespan: Correct installation can extend the lifespan of your new battery by avoiding unnecessary wear and tear.
Conclusion
Knowing how to connect a car battery correctly is a valuable skill for any vehicle owner. By following these simple steps and safety precautions, you can ensure your car’s electrical system remains in optimal condition. Always remember to work with care, use the right tools, and dispose of old batteries responsibly.
By mastering this skill, you’ll not only save time and money but also gain the confidence to perform basic car maintenance on your own.
If you need help with other car maintenance tasks or want to learn more about batteries, feel free to explore our other guides!
